

Project Tiny is built by Unity to create the smallest possible game builds. The main target for it is small and light mobile games, Instant Games, and Playable Ads.
Its build on top of Unity’s DOTS, so workflow it’s a little bit different than what we’re used to in Unity.
But I’ll try to explain it the best I can!
Note that this is still pretty much in development, so beware that this post’s content can become outdated. This post is using Project Tiny version preview.1 – 0.25.0. In such a case, let me know! I’ll try to keep it updated!
To read up to date documentation follow this link.
Create a new Unity project 🧰
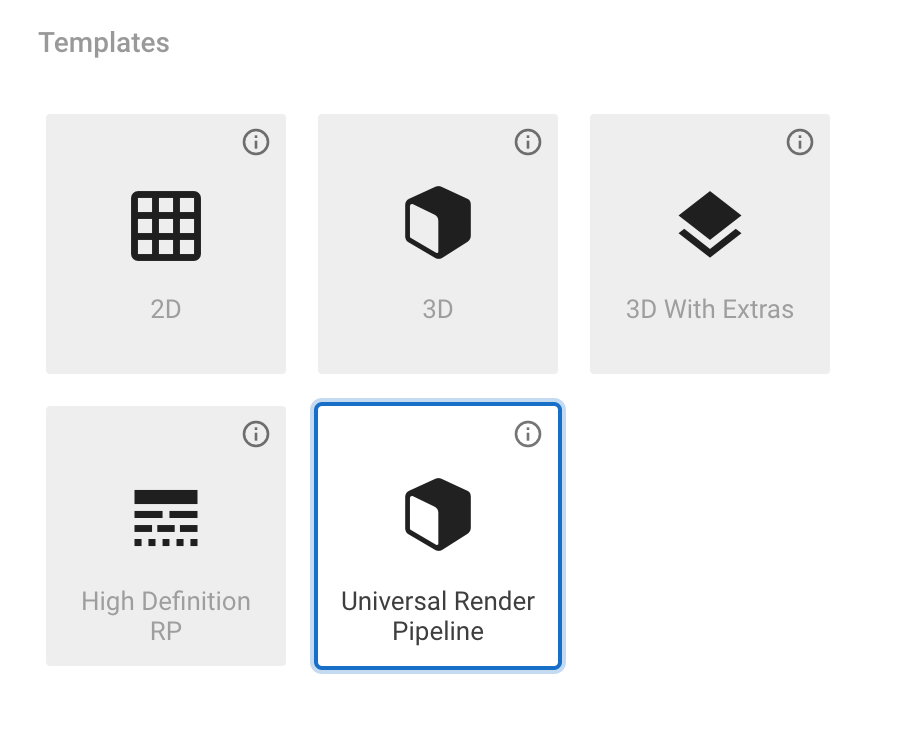
To create a project for Project Tiny, you have to use the Universal Render Pipeline template.
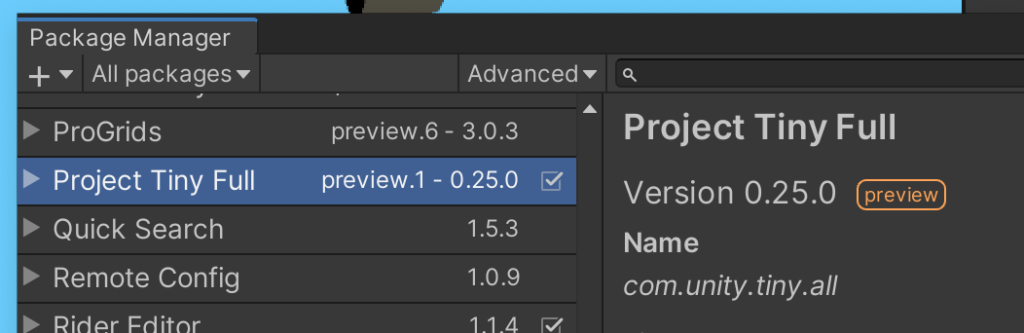
The next step is to add the Project Tiny package from Package Manager.
To do it, you have to open the Package Manager and enable showing packages in preview.

Now you have to find Project Tiny Full package and install it.
When that’s done, it’s time to code!
Writing code for Project Tiny with DOTS 🔌
I wrote a few posts about introduction to ECS, my thoughts about it, or how to renders sprites and have animations from code!
For Project Tiny, we have to make some additional steps, like creating a separate assembly.
To create one, you have to create a new folder first. Let’s name it “TinyExample”.

Now, you have to create an assembly definition. You can name it also as “TinyExample”.

With assembly created, now we have to assign definition references. Create a place for 7 references:
- Unity.Entities
- Unity.Entities.Runtime
- Unity.Collections
- Unity.Transforms
- Unity.Mathematics
- Unity.Tiny.Core
- Unity.Tiny.Rendering

Building systems for Tiny 👨💻
If you want to create a new system, now it’s time to do it!
I can show you a simple example of building one, but I would recommend reading introduction to ECS.
Let’s create one component script and one system script. Those will be “CircleMovementComponent” and “CircleMovementSystem”.
using Unity.Entities;

/// <summary>
/// Circle movement component.
/// Store component configuration.
/// </summary>
[GenerateAuthoringComponent]
public struct CircleMovementComponent : IComponentData
{
    public float PositionMultiplier;
    public float Speed;
}
using Unity.Entities;
using Unity.Transforms;
using Unity.Mathematics;

/// <summary>
/// Circle movement system.
/// Responsible for moving object around
/// </summary>
public class CircleMovementSystem : SystemBase
{
    protected override void OnUpdate()
    {
        // Get time
        var t = (float)Time.ElapsedTime;

        // Move each entity with CircleMovementComponent
        Entities.ForEach((ref Translation pos, ref CircleMovementComponent cm) =>
        {
            // Assign position on a circle
            pos.Value = new float3(math.sin(t * cm.Speed), 0, math.cos(t * cm.Speed)) * cm.PositionMultiplier;
        }).ScheduleParallel();
    }
}
Great! But we don’t have anything to we can attach it to! 😱
Continue reading with part 2 📖
This post is already a little bit lengthy, so I’m inviting you to continue reading with Setting up Project Tiny in Unity (part 2).
See you there!
Or leave a comment if you have a problem with something here in the comment section below! 👨💻
You can also join my newsletter to don’t miss any future post! 🔥